How to Set Up
Your Own VPN Server
A step-by-step guide showing exactly how I set up my own WireGuard VPN server at home and connect to it from anywhere in the world.
Updated: March 2026
Start the Guide ↓Intro
I've been helping people set up home WireGuard VPN servers for years now, so I decided to just go ahead and make a proper guide.
The beauty of this setup is that, to other computers, no matter where you are in the world, it'll always look like you're sitting comfortably at home. Your streaming services work, your bank doesn't freak out, and your traffic stays encrypted through your own tunnel, not some third-party VPN company's servers. Best of all, once you set it up, it's completely free to use forever!
Of course, if you're trying to spoof your employer, there are still other ways they can detect you so it's not foolproof. But if you follow the tips and tricks in this guide, you've got a good chance of flying under the radar for years to come. In the end, you'll need to weigh your own personal risk vs. reward.
What You'll Need
- Decently fast internet at your home base - your VPN speed is limited by your home upload speed.
- A small VPN server box - lives next to your home router, always on, running WireGuard (a fast, modern type of VPN).
- A travel router - pocket-sized, connects to your local WiFi on one end, and routes everything back through your home VPN on the other.
- Access to your home router - You'll need to be able to access the admin page of your home router. This part can be tricky since each one is a little different.
- A little bravery - We're going to be tinkering in unfamiliar interfaces and modifying multiple routers' configuration settings. Be brave!
That's it!
I'll walk you through exactly how I have my own personal setup working, the specific gear I use, and step-by-step how everything is configured. You can decide if you want to use what I have or swap in your own hardware.
Step 1: Get the Gear
Here's the exact setup that I use. You don't have to get the same gear, but this is what's been working great for me for years. I recently upgraded from older versions of these bad boys. These are amazing pieces of tech.
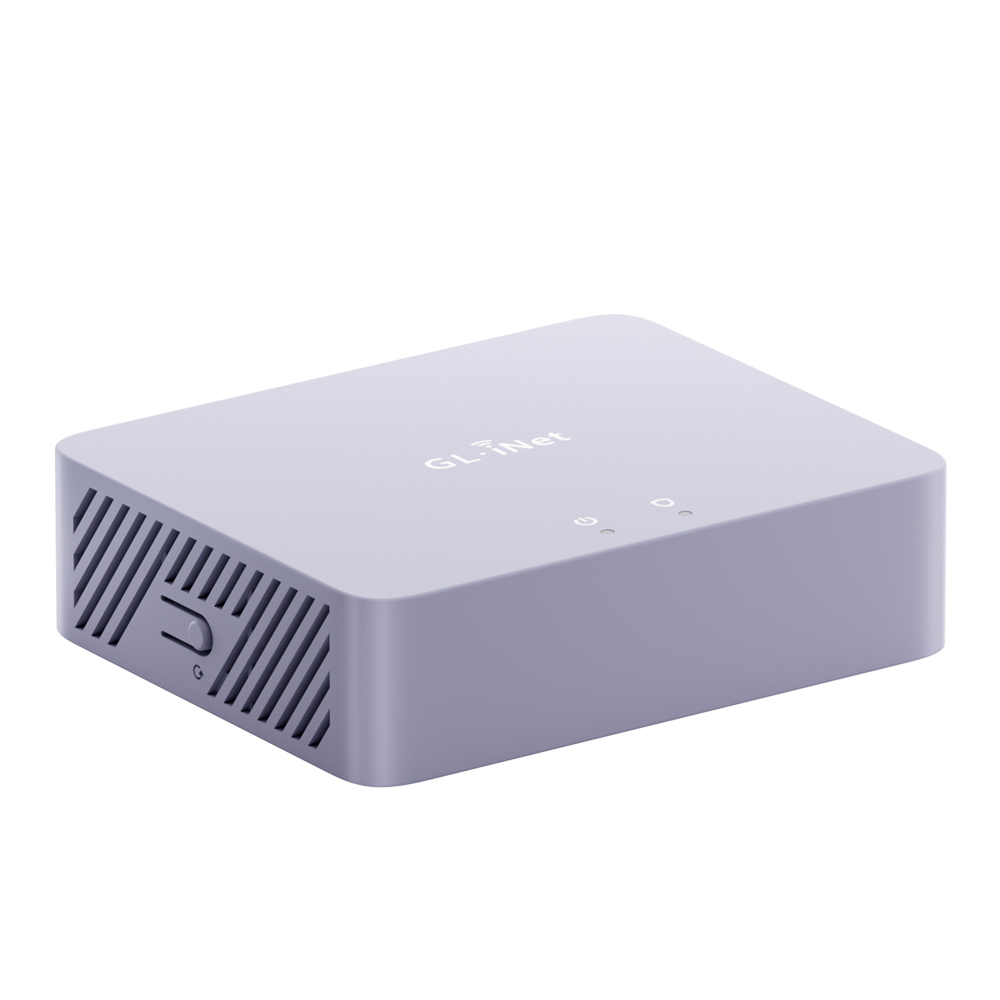
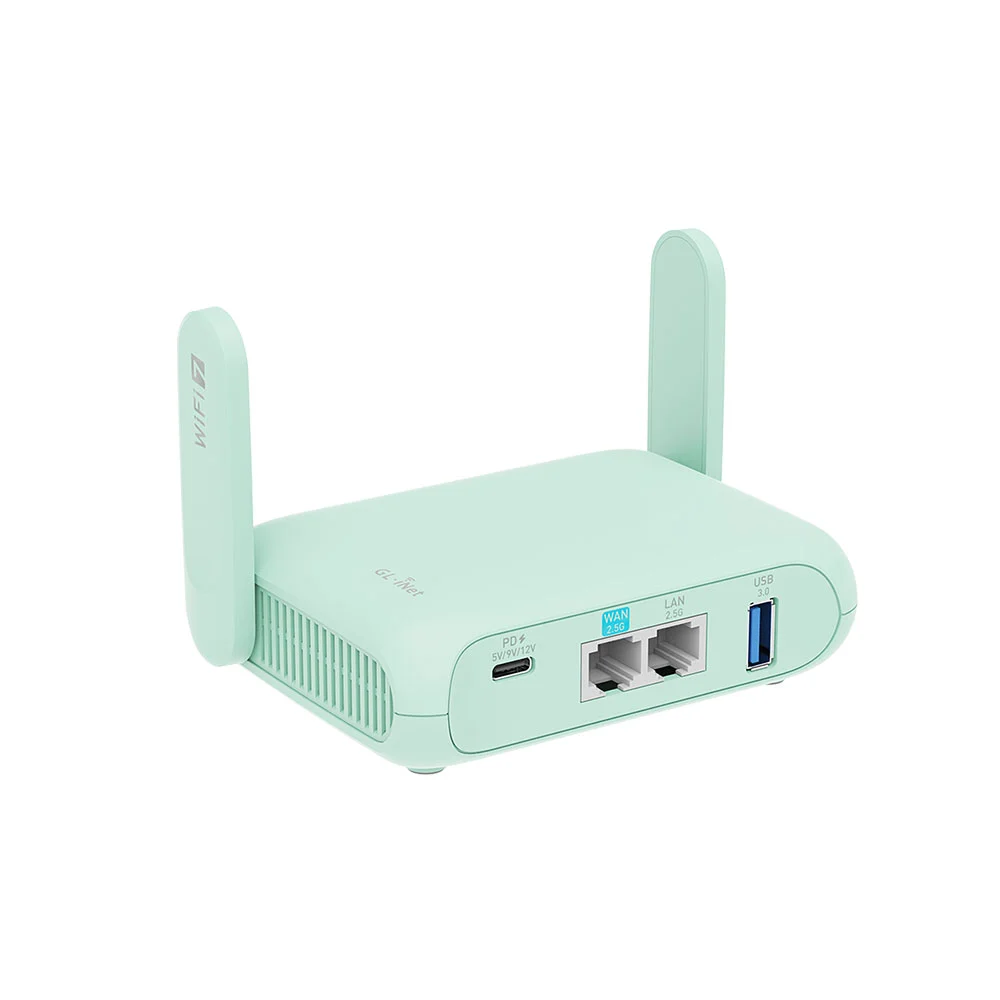
GL.iNet Brume 3 (GL-MT5000)
Home VPN Server
This is where your home Wireguard VPN server will live and run 24/7. It's essentially a mini computer that will process all of your internet traffic. This model was just released and is blazing fast.
- Up to 1100 Mbps VPN speed, wow!
- Powered by USB-C - extremely low power usage.
- No fans or moving parts - completely silent.
- Designed to run 24/7 all year.
Usually $129.99
Buy on Amazon → Buy on GL.iNet →Older Brume 2 also works - $89.99
Brume 2 on Amazon →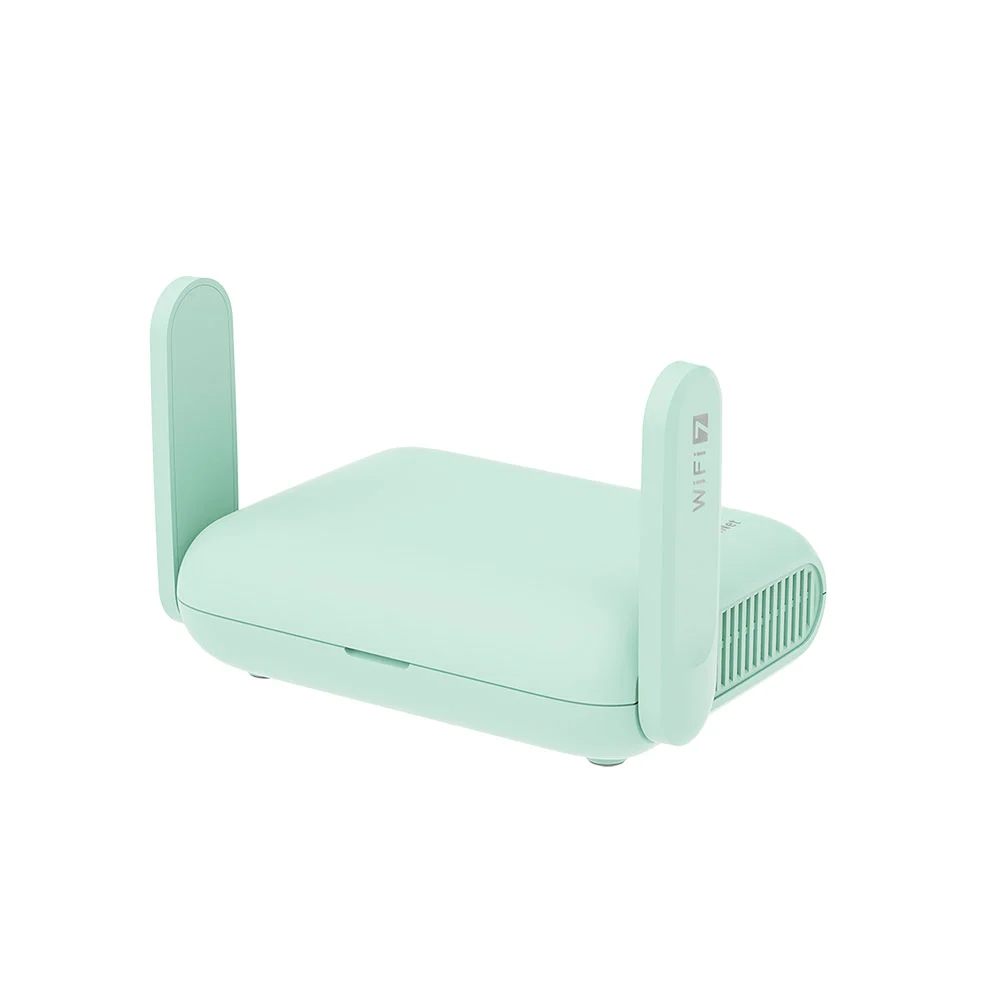

GL.iNet Beryl 7 (GL-MT3600BE)
Travel Wifi Router
Also just released, this is your travel companion that pairs perfectly with the Brume 3. You will link this router back to your home VPN server while you explore the world.
- Latest Wifi 7 protocol.
- Max VPN speed of 1100Mbps.
- Powered by USB-C - can even run off a power bank.
- Small enough to fit in your pocket, but powerful enough to reach the whole apartment.
Usually $139.99
Buy on Amazon → Buy on GL.iNet →That's it! Once you get these gadgets, we can begin the setup. Move on to Step 2.
Step 2: Home VPN Server Setup
A: Connect the Brume to Your Home Wifi Router
Ok, take a deep breath, and let us begin. First unbox the Brume 3.
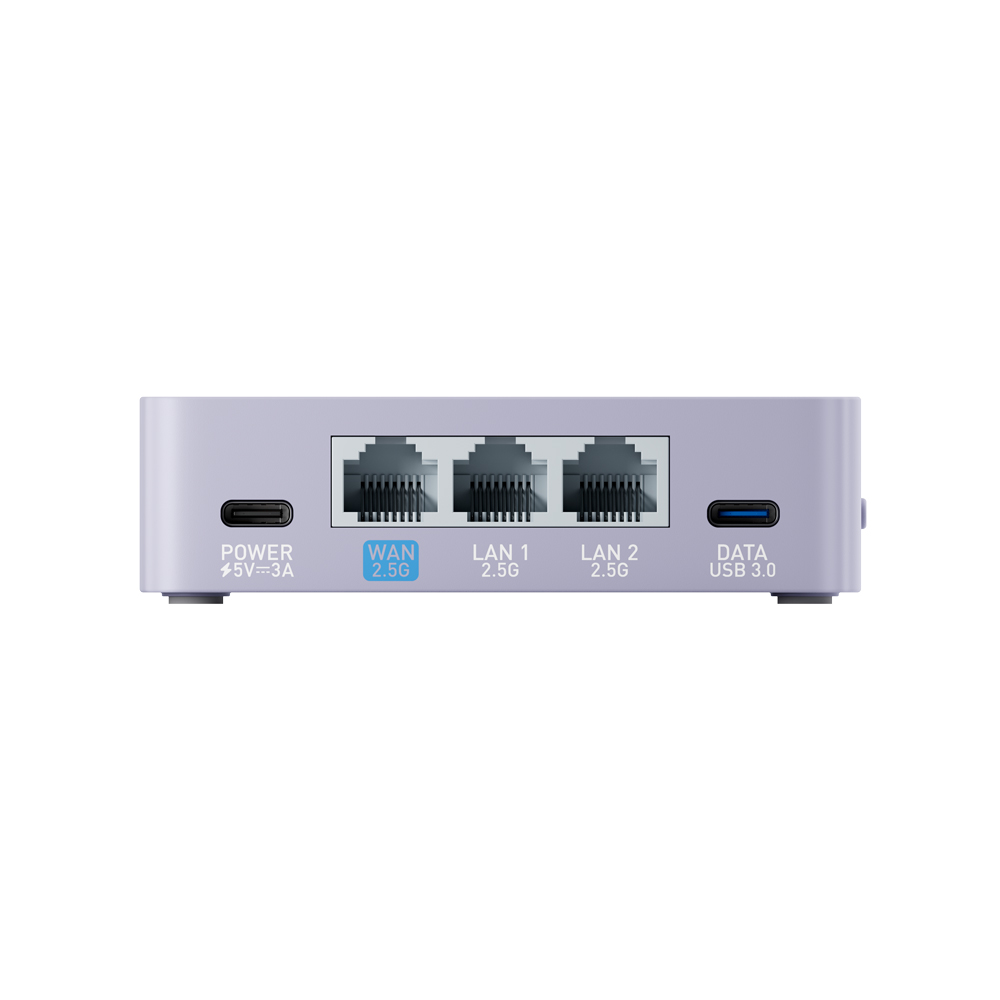
- Plug one end of an Ethernet cable into the Brume 3's WAN port (not a LAN port) and plug the other end into an available LAN port on your home router.
- Plug a USB-C power cable into a wall outlet adapter and the other end into the Brume.
- Give it about 30 seconds to boot up
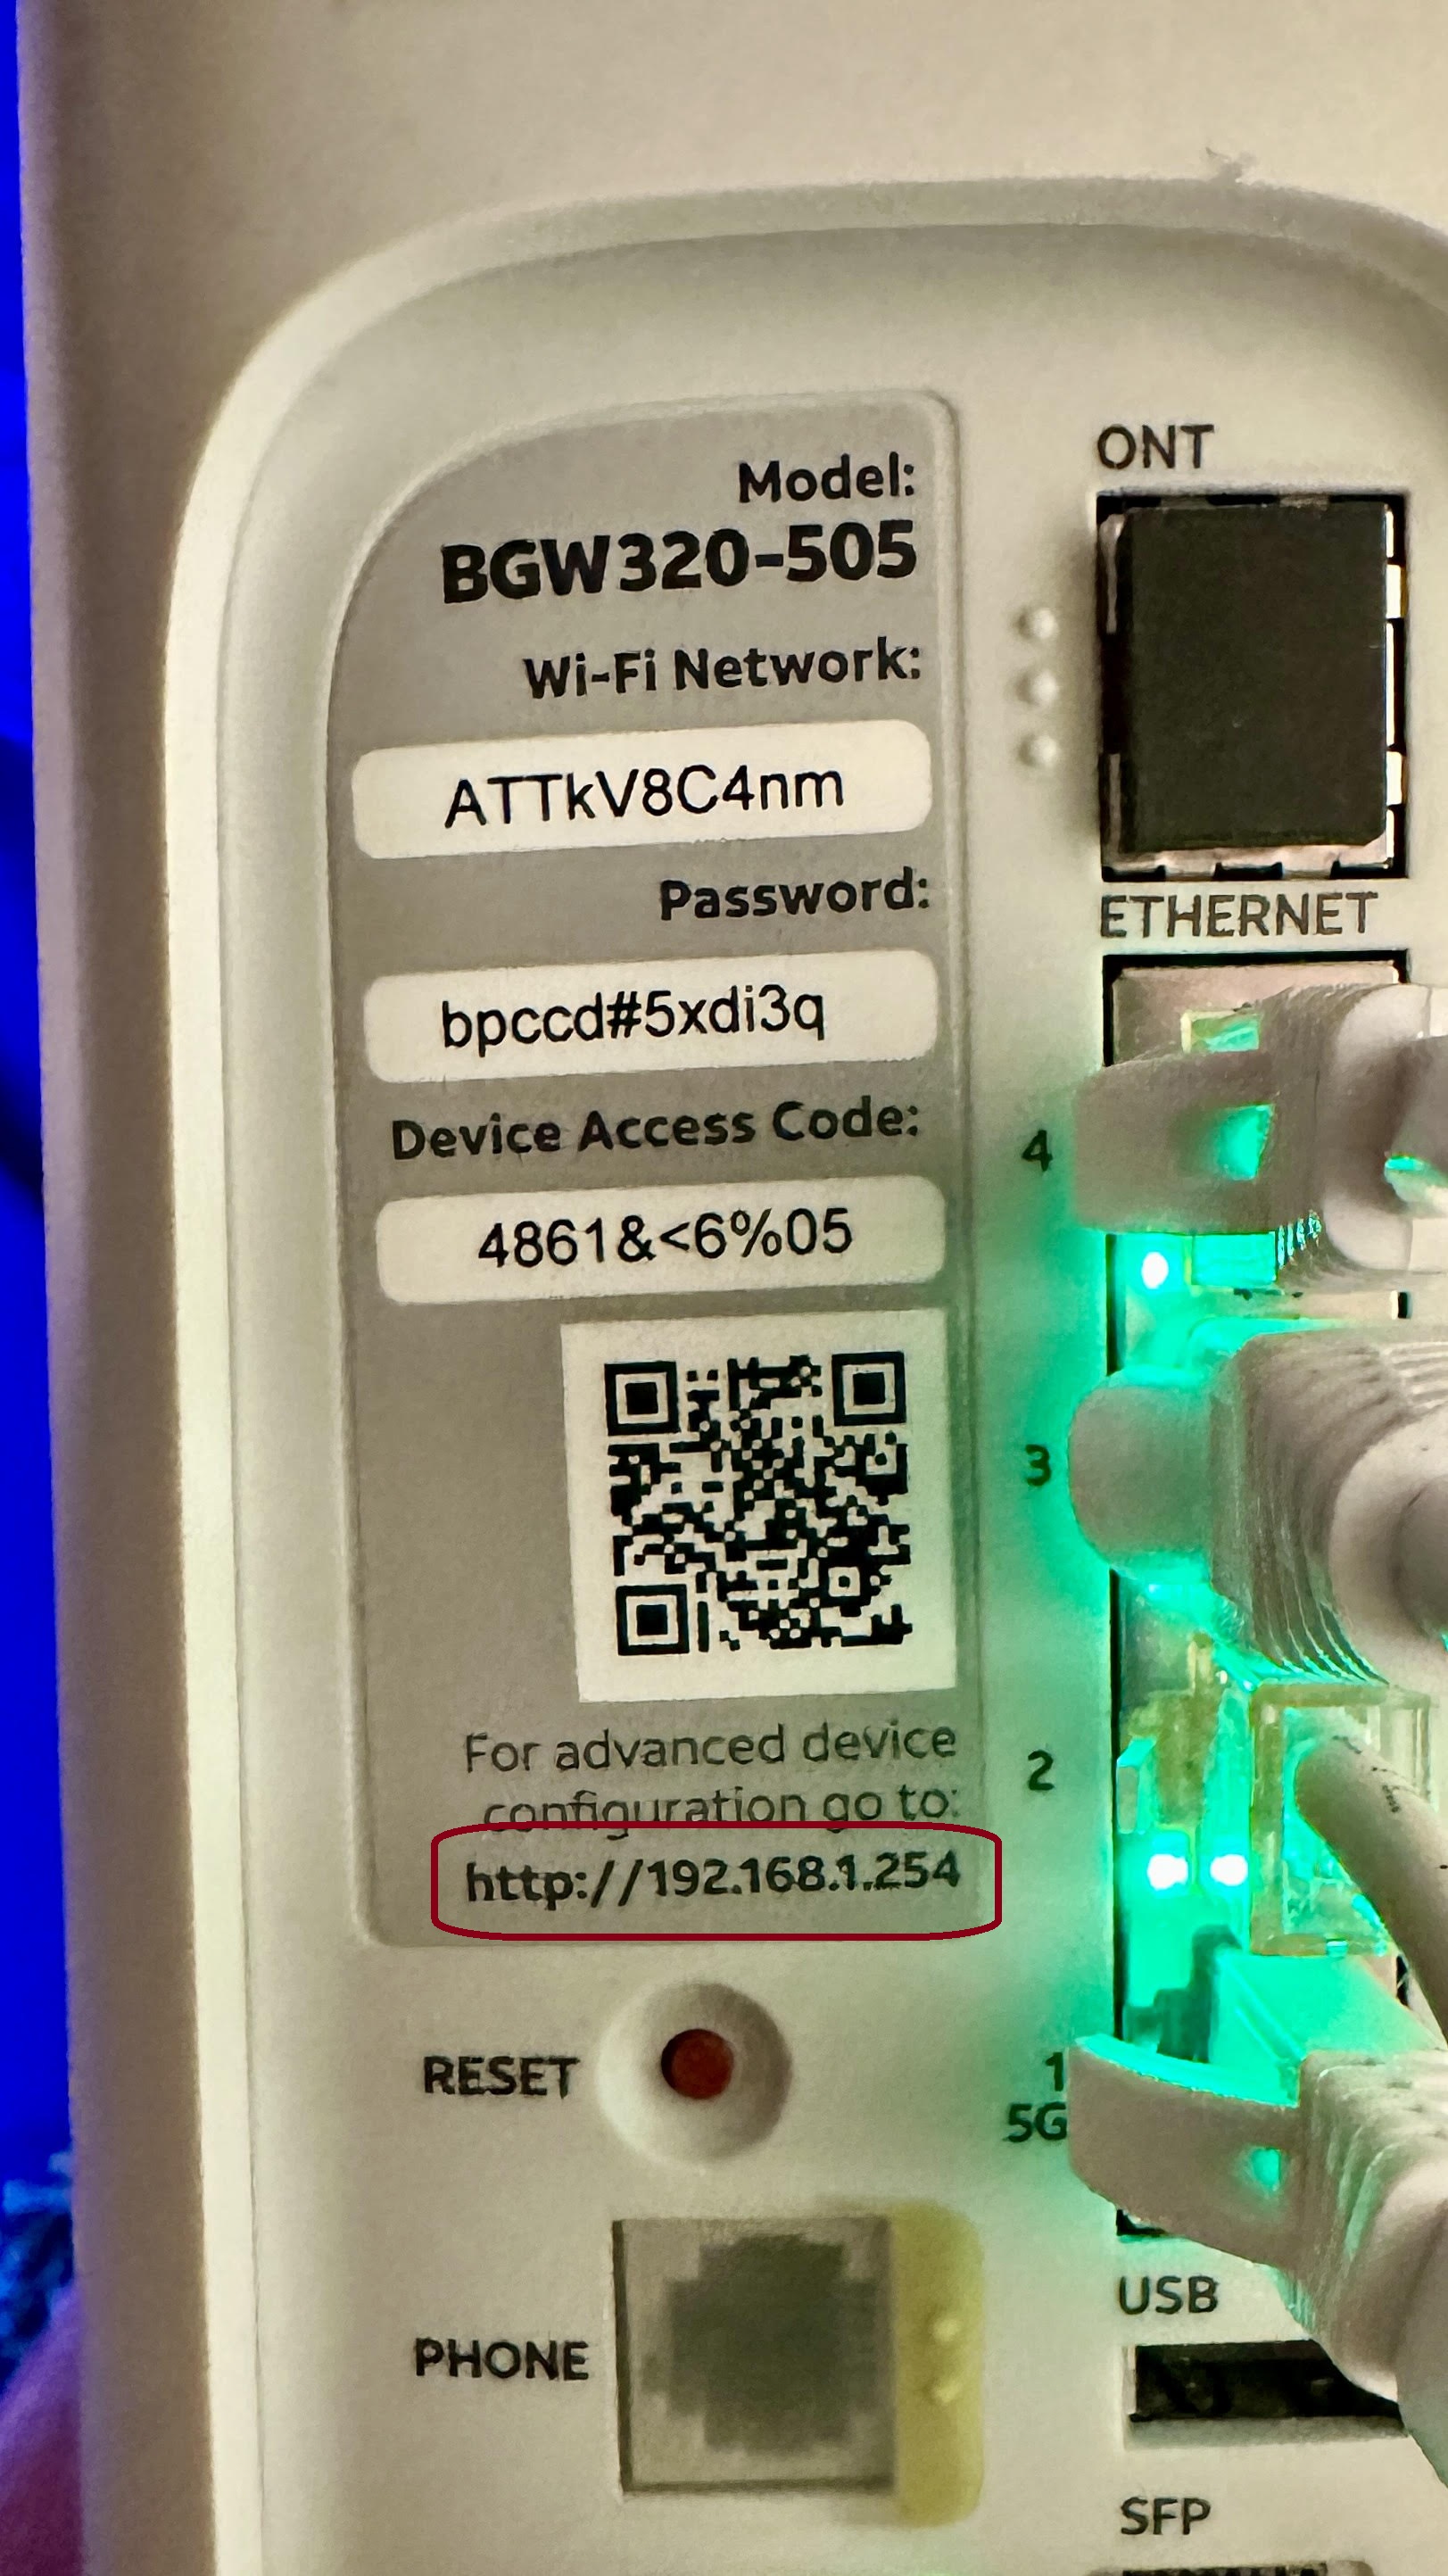
- Next we're going to need to log in to your existing Wifi router's admin page to find the Brume's IP address. This part can be slightly tricky. Every router is a little different but most of the time you can find the login information printed on a sticker on the back or bottom of the router. It usually includes an IP address and sometimes a username and password. If not, just Google (or ask AI) what the normal login credentials are for your exact router model. Here's what mine looks like on the back:
- Go to your laptop and make sure you're connected to your home Wi-Fi network and that any VPNs are turned off. Open up a web browser and type in your router's IP address that you just looked up. In my case it was http://192.168.1.254
- If all went well you should be looking at your router's admin panel. Enter a username or password here if it asks and log in.
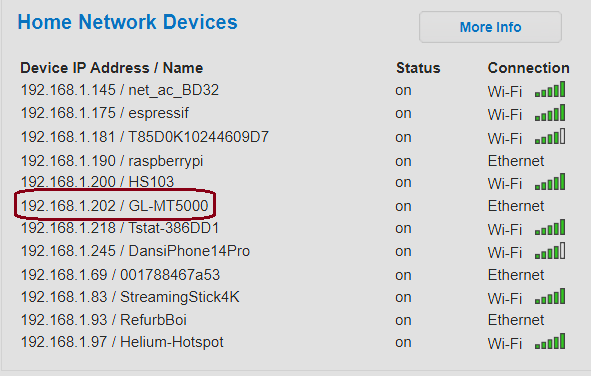
- Now that we're in we're going to want to find our Brume's IP address. This could be in a number of places. It could be on the main screen, or you might need to click around to find it. Look for pages like "Connected Devices" or "Device List". In my case this list was just at the bottom of the main page:
- Look for a device called GL-MT5000. That's our Brume! Its IP address should be stated nearby as well. In my setup the IP address given was 192.168.1.202. That's what we want.
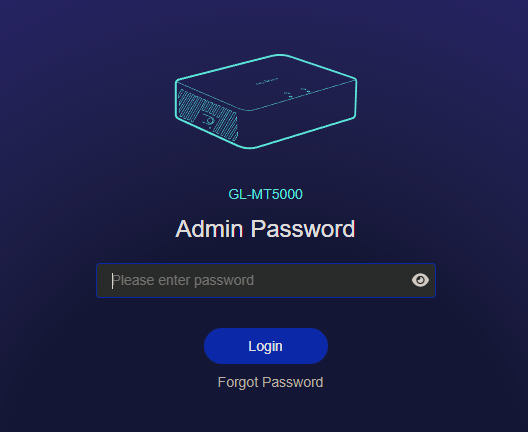
- Now open a fresh browser tab (without closing our current one, we're going to need it again very soon) and type in https://<brume's IP>. In my case I typed in https://192.168.1.202. Note: make sure you type https and not http, big difference!
- If a page loads that looks similar to this, you did it! If not you'll need to troubleshoot.
- Choose your language and create an admin password (DO NOT forget this!). Once that's done, you're in. The hardest part is now behind you.
B: Update the Firmware
Before continuing, I recommend checking for a firmware update on the GL.iNet Brume 3. Router firmware updates often include security fixes and performance improvements.
Sometimes the router will automatically show a firmware update notification the first time you log in.
If you see a message like:
New firmware availableYou can simply click Upgrade and follow the prompts. The router will download the update and reboot automatically. This usually takes 2–3 minutes.
If you do NOT see an update prompt, you can manually check for updates:
- In the left sidebar, click System
- Click Upgrade
- Click Check for Updates
- If an update is available, click Upgrade
Wait for the router to install the update and reboot. Once it finishes, log back into the router to continue.
C: Enable GoodCloud Remote Access
Next we're going to want to enable remote management. This is so we can access the Brume's user interface from anywhere in the world. This is especially important in case something goes wrong with your VPN server. Right now we can only access it while connected to our local Wifi network. This will be critical so you can enable/disable the VPN, make changes, or troubleshoot issues while you're abroad.
GL.iNet provides a free service called GoodCloud that allows secure remote access to the router's admin page. It's a really cool feature.
To enable it:
- Navigate to Cloud Services -> GoodCloud in the sidebar
- Click Get started
- A new tab will open and you will need to sign up for a GoodCloud account.
- Once you finish, GoodCloud will ask you to confirm your Brume's info (you can give it a memorable name if you want) and click Bind.
- After binding if you see a page like this, you did it! Your Brume is now live on GoodCloud and you will be able to access it from anywhere in the world. We'll circle back on how to actually use GoodCloud later.
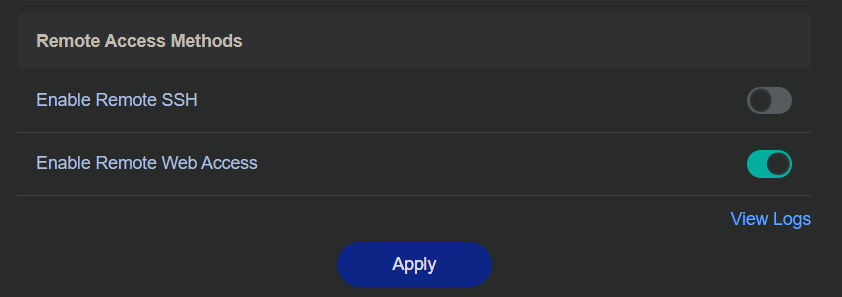
- Swap tabs back over to your Brume admin page and click Enable Remote Web Access. You're done with this for now.
- In the sidebar, click Applications -> Dynamic DNS
- Click Enable DDNS
- Check that you have read and agreed to the Terms of Service & Privacy Policy
- Click Apply
- Boom! You now have a new permanent hostname for your Brume. It will appear as <name>.glddns.com
- In the Brume's admin panel sidebar, click VPN → WireGuard Server
- You should see the WireGuard Server page. Leave all the default settings and click Start to enable it. Now your own VPN server is activated!
- Now click the Profiles tab. Here is where we will add your devices.
- Click Add then name your cell phone like
My iPhoneand click Apply. Remember, we are going to use your mobile phone to test your VPN setup once we're finished with the configurations. - If all goes well you should be greeted with a QR code. This QR code contains the configuration data needed to connect your device to your Wireguard VPN, and is a really handy way to share that data, especially when connecting a mobile phone (as we will soon see).
- That's all we need to do for now, we will come back to this page later after everything else is set up.

D: Set Up Dynamic DNS (DDNS)
Your home internet connection most likely has a dynamic IP address - meaning your Internet Service Provider can change it at any time. If that happens while you're traveling, your VPN will stop working because it won't know where to connect.
The fix is Dynamic DNS (DDNS). This is a free service that Glinet provides that is crucial to keeping your VPN up and running as long as possible. It gives your home network a permanent address (like myhome.glddns.com) that always points to your current IP, even when it changes.
The Brume 3 has DDNS built in:
The router will now automatically update your DDNS hostname whenever your home IP changes. You'll use this hostname later when configuring your VPN client.

E: Set Up the WireGuard Server
Next we're going to activate the Wireguard server on your Brume and create your first client profile. You'll need a client profile for every device you want to connect to the VPN. Like your travel router, your laptop, your friend's Macbook etc. For most people just having the travel router connected will do. However for testing purposes I'll also have you add your mobile phone.
Important: Treat your QR code and configuration data like passwords. Anyone who has it can connect to your home network. Don't email them or store them in the cloud unencrypted.
Step 3: Wifi Router Config (port forwarding)
OK now we're going to switch back over to your Wifi router's admin page. Hopefully you left it up on another browser tab. What we're going to do next is a critical part of the process: port forwarding - basically telling your home router "hey, when VPN traffic comes in from the internet, send it to the Brume." The specific port we're going to be forwarding is 51820.
Without this step, your VPN connection requests will hit your home router and get ignored. Port forwarding is what connects the outside world to your Brume's WireGuard server.
- Swap back over to your wifi router admin page. If you closed it, open up a new tab and navigate back the same IP address we used in Step 2-A (mine was
http://192.168.1.254). Log in with your router's admin credentials if prompted. - Now we need to find the Port Forwarding settings. Just like with finding the Brume's IP address before, every router manufacturer puts it in a different place and calls it something different. Here are some common locations depending on your router:
- AT&T / BGW320: Firewall → NAT/Gaming
- Netgear: Advanced → Advanced Setup → Port Forwarding / Port Triggering
- TP-Link: Advanced → NAT Forwarding → Port Forwarding (or Virtual Servers)
- Linksys: Security → Apps and Gaming → Single Port Forwarding
- ASUS: WAN → Virtual Server / Port Forwarding
- Xfinity / Comcast xFi: Advanced Settings → Port Forwarding
- Verizon Fios: Advanced → Port Forwarding
If you don't see any of these, try searching your router's settings for keywords like "port forwarding", "NAT", "virtual server", or "gaming". Or just Google "your router model port forwarding" - there's almost always a guide out there.
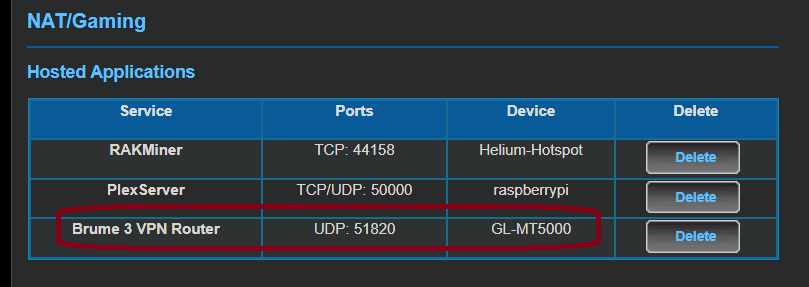
- Once you've found the port forwarding page, we need to create a new rule. Click Add, Create, New Rule, or whatever your router calls it. You'll need to fill in these values:
Port Forwarding Rule
Service Name:    WireGuard (or whatever you want to call it)
Protocol:        UDP
External Port:   51820
Internal Port:   51820
Internal IP:     [Your Brume's IP address, e.g. 192.168.1.202]
A few important notes here:
- Protocol must be UDP, not TCP. WireGuard only uses UDP. If your router only gives you a "Both" option, that works too.
- Port 51820 is the default WireGuard port. You can change it in the future if you need but most likely won't have to.
- The Internal IP is the Brume's IP address we found back in Step 2-A. Make sure this is correct - if it's wrong, traffic will go to the wrong device.
- Here's what mine looks like:
- Click Save or Apply to activate the rule.
- Some routers require a reboot after adding port forwarding rules. If yours asks you to restart, go ahead and do it. Give it a minute or two to come back online.
That's it for your home router! The port forwarding rule is now directing all incoming WireGuard traffic (coming in port 51820) straight to your Brume 3. Your home setup is nearly complete - the Brume is running a WireGuard server, it has a permanent DDNS address, and your router knows to forward VPN traffic to it. Next we're going to test it with your cell phone.
Expert Tip: If your Brume's IP address ever changes (which can happen if your home router reboots), the port forwarding rule will break. To prevent this, consider setting a static IP or DHCP reservation for the Brume in your home router's settings. This tells your router to always assign the same IP address to the Brume. Look for "DHCP Reservation", "Address Reservation", or "Static Lease" in your router's LAN or DHCP settings. Your router might already do this (mine does).
Step 4: Test VPN on Your Phone
If you've made it this far, congrats! Most people give up by now or run into too many roadblocks. Now comes the moment of truth: we're going to download the Wireguard app on your mobile phone, import your VPN config via QR code, and let 'er rip.
A: Install the WireGuard App
- On your phone, download the WireGuard app. It's free and available on both the App Store (iOS) and Google Play (Android). Just search "WireGuard" - it's the one with the red dragon logo.
- Make sure your phone is not on your home Wi-Fi network. If you're on the same network as the Brume, the test won't prove anything - we need to simulate being somewhere else. So:
- Turn off Wi-Fi on your phone so it's using mobile data (4G/5G)
- Make sure any other VPNs you have on your phone are turned off
B: Configure QR Code
- Now go back to your laptop and open up the Brume's admin panel (which you should still have open in a tab). Navigate to VPN → WireGuard Server.
- Click the profiles tab, then click the little export button on the right of your mobile phone's profile.
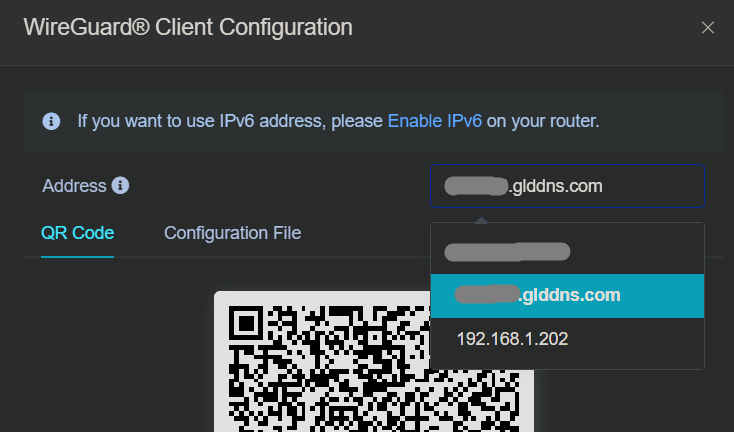
- The QR code you saw earlier should pop up. Here's a key part: in the addresses drop down list select your DDNS address that we created back in step 2D. This is the one that looks like <yourDDNSname>.glddns.com. Remember, this is the trick that allows your VPN to stay enabled even if your router/ISP changes your home IP address.

C: Connect and Test
- Now open the WireGuard app on your phone, tap the + button and select "Create from QR code"
- Point your phone's camera at the QR code on your laptop screen and it should instantly detect the config. Give the connection a name like
Home VPN. - That's it! You should now see your new VPN connection listed in the WireGuard app. Going forward all you have to do is hit the toggle switch to enable/disable the VPN.
- Now, for the moment of truth, tap the switch to turn it on. Your phone may ask for permission to add a VPN configuration - tap Allow.
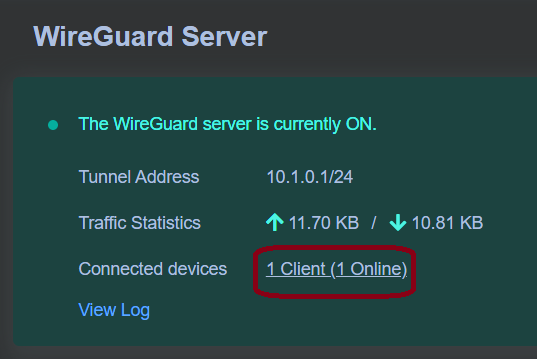
- Now go back over to your Brume admin panel. Close the QR code and look at the top of the page at the statistics. If you see 1 Client(1 Online) next to Connected devices, you're connected! Also next to Traffic Statistics you should see some data flowing (that's data coming to and from your phone through the Brume).
Congratulations, your VPN is working! 🎉 - Want to see how fast your VPN is? Run a speed test on your phone while connected to the VPN (try fast.com). Keep in mind your VPN speed will be limited by both your home internet upload speed and your mobile connection, so it'll likely be slower than normal - but it should still be very usable.
Troubleshooting: If the tunnel won't connect or you see no data transfer, here are a few things to check:
- Make sure Wi-Fi is off on your phone - you must be on mobile data
- Double-check the port forwarding rule in Step 3 (correct port, correct IP, UDP protocol)
- Verify the WireGuard server is running on the Brume (VPN → WireGuard Server should show "Running"). This one can be a real stickler.
- Make sure DDNS is turned on and you set the DDNS hostname as the external address in the WireGuard Server settings (Step 2-E)
- Try rebooting the Brume and your home router, then test again
Step 5: Travel Router Setup
If you've made it this far, just know all the hard parts are behind you. It's smooth sailing from here on out. It's now time to set up your trusty travel companion, the GL.iNet Beryl 7. This little router is going to travel with you around the world and connect to whatever Wi-Fi is available (hotel, Airbnb, coffee shop), then route all your traffic through your home VPN. Every device you connect to it (laptop, phone, tablet) gets VPN protection automatically without installing anything on each device.
A: Unbox & Initial Setup
Let's get the Beryl 7 up and running for the first time. A lot of this is going to feel very familiar since it's similar to the Brume. You're pretty much an expert already.
- Unbox the Beryl 7 and plug in the USB-C power cable. You can plug it into a wall adapter or even a USB port on your laptop - it's that low-power.
- Give it about 30 seconds to boot up. You'll see a light on the front turn solid.
- On your laptop, open your Wi-Fi settings and connect to the Beryl's network. You should see something like
GL-MT3600BE-xxx. The default password is usually printed on the bottom label of the Beryl. - Open a browser tab and go to
192.168.8.1. This is the Beryl's admin panel - looks very similar to the Brume's since they're both GL.iNet products. - Choose your language and create an admin password. Just like the Brume, don't forget this password! Click next.
- Here you can name your Wifi networks if you want. The Beryl puts out both a 2.4GHz and 5GHz signal simultaneously, so you can name them each. Also give your networks a password. You can change these settings easily later on as well.
- Enable the 160Mhz Dynamic Bandwidth button. This is a cool new feature unique to the Beryl 7 that enhances the Wifi coverage. Click next. Note: If you renamed your Wifi network, you might lose connection to your Beryl. If so, wait about 30 seconds then try to re-connect to your newly named network.

B: Connect to Wi-Fi (Repeater Mode)
Travel routers work by connecting to an existing Wi-Fi signal and rebroadcasting it as their own network. This is called Repeater mode. For now, we'll connect it to your home Wi-Fi to get it online. When you're traveling, you'll do this same process with whatever Wi-Fi is available at your Airbnb or coffee shop. You'll need to do these steps every time you change location.
- The Beryl will now take you to the main admin screen. Right away choose Repeater mode on the big popup.
- The Beryl will scan for nearby Wifi networks. Select your home Wifi, enter your network password, and click join.
- If all goes well you'll get a Completed! message. Your travel router is now live on the internet!
- If you get a VPN popup, click Not Now. We'll circle back to this soon.
To test it, try opening a website while connected to the Beryl's Wi-Fi. If pages load, you're connected and online.
C: Update Firmware
Now that the Beryl has internet access, same drill as the Brume - let's make sure it's running the latest firmware before we configure anything.
- If the Beryl shows a firmware update notification, go ahead and click Upgrade and let it do its thing.
- If not, go to System → Upgrade in the sidebar and click Check for Updates.
- If an update is available, click Upgrade and wait for it to install and reboot. This usually takes 2–3 minutes.
- Log back in once it's done.
D: Create WireGuard Client
On the home stretch here! Now we're going to set up the Beryl as a Wireguard client, which means it will create a connection back to your Brume 3 VPN server.
First, we need to create a new profile on the Brume for the Beryl (just like we did for your phone):
- On your laptop, open the Brume's admin panel and go to VPN → WireGuard Server → Profiles.
- Click + Add and name it something like
Beryl Travel Router. - Click Apply to create the profile.
- Just like we did with your phone, select <yourDDNSname>.glddns.com on the dropdown list.
- This time click the blue Export button at the bottom of the window to download the
WireGuard Configurationfile. Remember where you downloaded it (probably the Downloads folder).
Now let's import that config into the Beryl:
- Go back to the Beryl's admin panel (
http://192.168.8.1). - In the sidebar, click VPN → WireGuard Client.
- Click +Add Manually.
- Click Select a file to upload and find the config file you just downloaded.
- If all goes well you'll see a big green Upload Successful. Click Apply.
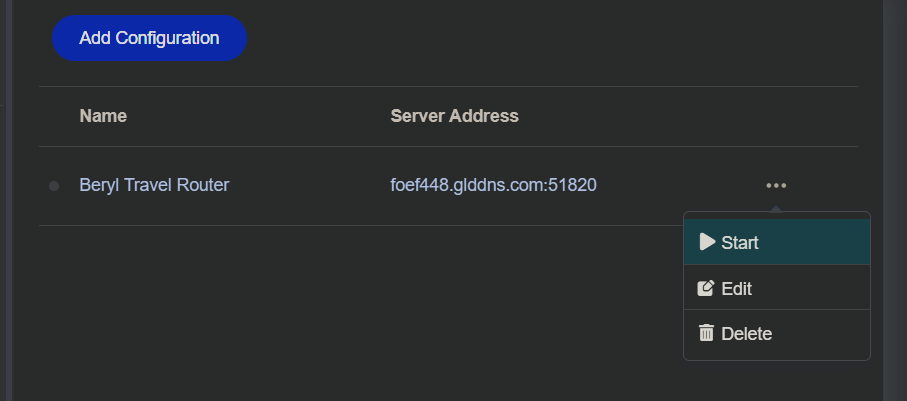
- You should now see your VPN connection listed. Click the three dots on the right and click Start.
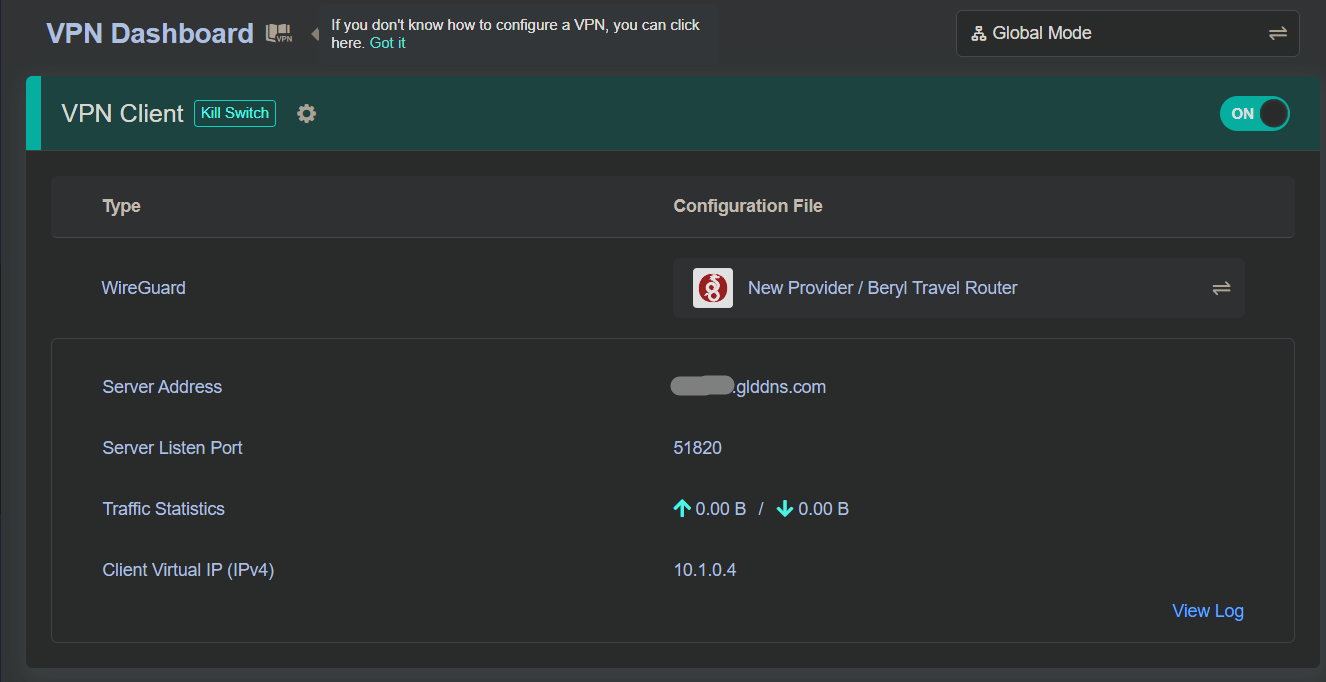
- Now on the left menu go to VPN -> VPN Dashboard. You should see all the stats for our VPN connection on the Beryl. This is also where you'll come if you want to de-activate your VPN. Just flick the green switch. It's that simple.
- Try browsing some websites, streaming a video, or running a speed test at fast.com. Everything should work normally, just routed through your home connection.
- To double-check, go back to the Beryl's VPN Dashboard page. It should show the connection as active with data transferring (bytes sent/received going up).
- If everything seems normal up to this point you're probably good to go. However to do a real test you're going to need to go on a little trip.
E: Test the Connection
To make sure everything is properly working end-to-end, you're going to want to go test your setup in the field. The simplest way to test it all out is to travel to your favorite local coffee shop with the laptop and Beryl in hand.
- Grab a seat and power up the Beryl with the USB-C cable.
- By now you should know what to do: connect your laptop to the Beryl's wifi, go to 192.168.8.1, connect the Beryl to the coffee shop's wifi.
- Go to the VPN dashboard and make sure the VPN is off.
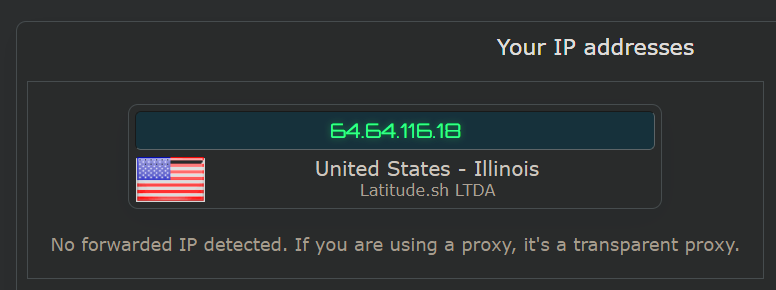
- Now go to ipleak.net. This is a cool website that tests all sorts of internet-related configurations. But what we're looking for now is your current IP address (aka the coffee shop's). Write that down.
- Now tab back over to your VPN Dashboard on the Beryl. Activate your VPN.
- Wait a few seconds, and then go back to ipleak.net and refresh the page.
- If your VPN is working, this IP will change back to your home IP. If this happens, you are officially good to go. Everything is now encrypted and routed through your home network. Congratulations! You're a bad ass VPN legend now. Go forth.
Pro tip: The Beryl remembers Wi-Fi networks you've connected to before. So if you go to the same coffee shop twice, it'll auto-connect. It also remembers your VPN config, so you really just need to plug it in, and toggle the VPN on. Takes about 30 seconds.
Pro Tips
VPN Kill Switch
This is a must-enable. A kill switch makes sure that if your VPN connection drops for any reason, all internet traffic stops instead of falling back to an unprotected connection. Without it, your devices could silently start sending traffic over the local network without you realizing it.
On the Beryl, go to VPN → VPN Dashboard. Click the gear icon. Enable the Kill Switch. This ensures that if the WireGuard tunnel goes down, nothing leaks through. You'll lose internet access but your location will stay secure.
GoodCloud Remote Access
Remember when we set up GoodCloud back in Step 2-C? This is where it really pays off. If something goes wrong with your VPN while you're abroad (maybe the server stopped, or you need to tweak a setting) you can log into goodcloud.xyz from any browser and access the Brume's full admin panel remotely.
From GoodCloud you can restart the WireGuard server, check connection status, update DDNS settings, reboot the Brume, and even manage client profiles. It's your lifeline when you're thousands of miles from home and something needs fixing.
Keep It Running While Away
Your VPN server needs to stay powered on 24/7 while you're traveling. A few things that can help:
- UPS battery backup - keeps your Brume and home router running through short power outages. You can get a small one for around $30-40.
- Smart plug - lets you remotely power-cycle the Brume or router from your phone if something freezes up. Just turn it off, wait 10 seconds, turn it back on.
- Auto-boot on power restore - most routers (including GL.iNet) automatically restart when power comes back. The Brume should come back online and resume the WireGuard server on its own after a power outage.
Backup VPN Server
What happens if your home internet goes down while you're abroad? You don't want to be stuck without any VPN at all. That's why it's smart to have a backup WireGuard server configured on your Beryl as a fallback.
The good news is GL.iNet makes this easy. On the Beryl's VPN → WireGuard Client page, you'll see a list of popular third-party WireGuard VPN providers you can set up with one click - like Mullvad (my personal favorite), ProtonVPN, AzireVPN, and others. Just sign up for one, add it as a second WireGuard client profile on your Beryl, and if your home VPN ever goes down, you can quickly swap to the backup with a couple of taps.
Need More Help?
If you're stuck on a step, found a mistake, or have a suggestion to make this guide better, I'd love to hear from you. Drop me an email at hello@nomadvpnguide.com and I'll do my best to help out.